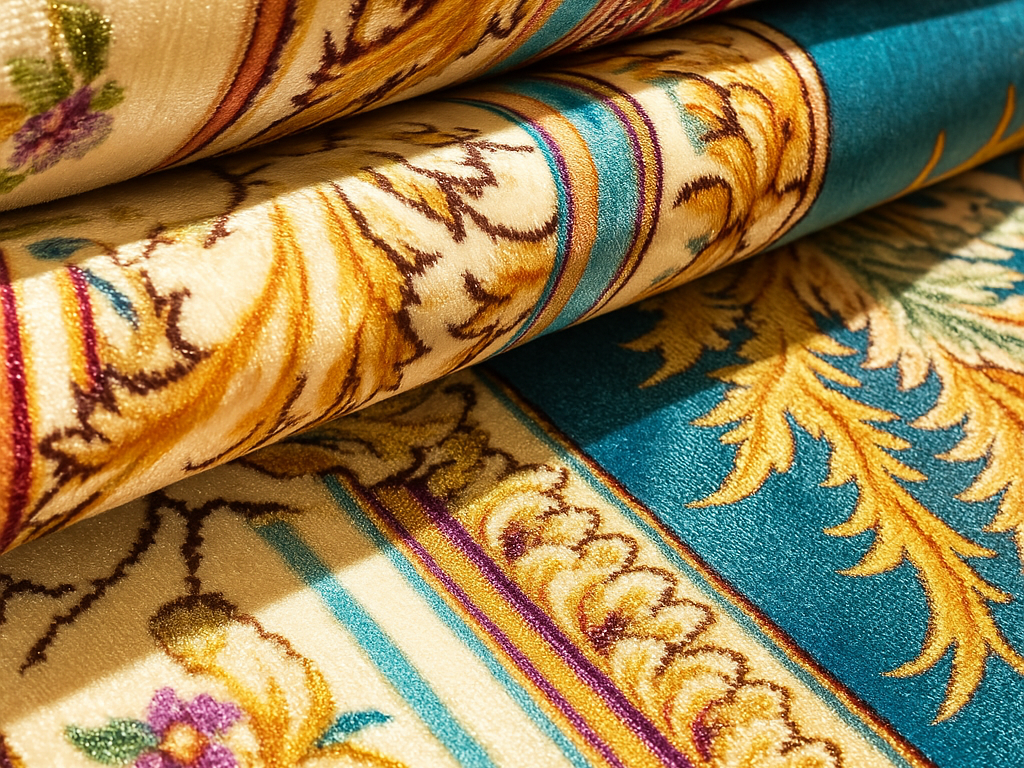
タフテッド・ラグ 鮮やかな模様と心地よい質感で、どんな空間も格上げしてくれると絶大な人気を博している。しかし、この芸術的な作品はどのようにして作られるのでしょうか?タフテッドラグの製造工程は、創造性、技術、高度なテクニックが複雑に絡み合っています。この記事では、最初のデザインから床を飾る瞬間まで、タフテッドラグの全製造工程をご紹介します。ラグのタフティング技術を理解したい方にも、単に製造の舞台裏に興味がある方にも、このガイドでタフテッドラグがどのように精巧に丁寧に作られるかを詳しくご覧いただけます。
デザイン段階:ラグの構想
すべてのタフテッド・ラグはビジョンから始まります。DIY愛好家の場合は、個人的なデザインをスケッチしたり、既成のテンプレートを選択したりします。商業施設では、デザイナーがソフトウェアを使用して、タフティングマシンに最適な複雑なパターンを作成します。人気のモチーフは幾何学的な形から自然を連想させるものまで幅広く、アーティストのシシ・サンの3Dフラワー・デザインなどの流行に影響を受けている。
主な検討事項は以下の通り:
- カラーパレット:毛糸の選択は、意図された美的感覚に沿ったものでなければならない。
- スケール:大きなラグは、視覚的な乱雑さを避けるため、大胆なデザインが必要です。
- 機能性:人通りの多い場所では、摩耗を隠す丈夫な柄が求められます。
タフティング文化の台頭
タフティングのDIY現象としての復活は、InstagramやTikTokのようなソーシャルメディアに後押しされ、2020年に始まった。タフティング・セラピー」を提供するワークショップが世界的に立ち上がり、クリエイティブな場を求めるミレニアル世代やZ世代を惹きつけた。手持ちの「タフティングガン」を使って布地に糸を打ち込むこの作業は、手触りの良さとインスタ映えする仕上がりを兼ね備えている。しかしそのルーツは、機械化されたタフティングがカーペット生産に革命を起こした19世紀のアメリカ・ジョージア州まで遡る。現在では、職人技と工業的効率性の架け橋となっている。
素材の選択正しい部品の選択
品質は素材の選択にかかっている:
- 毛糸:アクリル(安価)、ウール(耐久性)、コットン(バランス)が一般的。市販のラグは、弾力性を持たせるために化学繊維を混紡していることが多い。
- プライマリー バッキング:しっかりと織られたポリプロピレン(PP)またはポリエステルの生地がタフトを固定する。
- 接着剤:ラテックスまたは熱可塑性プラスチックがタフティング後の繊維を固定する。
- セカンダリー バッキング:フェルトやゴムのような素材は、安定性と滑りにくさを加える。
フレームのセットアップワークスペースの準備
頑丈なフレームは一次バッキングをピンと張り、タフティング時のシワを防ぎます。DIY用のフレームは木製で卓上サイズのものが多いが、工業用には4~5メートルに及ぶスチールフレームが使われる。タック・ストリップまたはグリッパーが生地の端を固定し、均一な張力を確保します。
デザインの移転設計図のマッピング
タフティングフレームがセットアップされ、裏生地がしっかりと張られると、タフテッドラグ製造工程の次の重要なステップは、デザインを生地に転写することです。この段階で、デザイン段階で思い描いた複雑なパターンが正確に再現され、タフト加工の正確なガイドとなります。
デザイン移転の方法
設計図を裏生地に写すには、いくつかの効果的なテクニックがある:
1.デザインの投影
ミニ・プロジェクターの活用は、タフティング愛好家の間で人気のある方法だ。伸ばした生地にデザインを投影することで、職人は生地の輪郭を直接なぞることができる。投影する前にデザインをデジタルでミラーリングし、生地の裏側から見たときに正しく表示されるようにすることが重要です。この技法は精度が高く、特に複雑な柄や細かい柄に有効である。
2.ハンドドローイング
手先が器用で、フリーハンドの芸術的センスがある人なら、裏生地に直接デザインを描くという選択肢もある。洗濯可能なマーカーや布用チョークを使えば、職人がパターンをスケッチすることができ、すぐに調整や個性化ができる。この方法は簡単で、追加の道具も必要ないため、初心者でも利用しやすい。
3.転写紙の使用
転写紙を使用することで、プリントされたデザインを裏生地に複製することができます。プリント柄と生地の間に転写紙を挟み、圧力をかけることで、生地の表面に柄が転写されます。この方法は、すでにプリントされたデザインに効果的で、複数枚にわたる均一性を保証します。
正確な設計移転のための考察
- 生地の向き:デザインは必ず裏生地の正しい面に転写してください。タフティングは裏側から行うため、正しく位置合わせを行わないと、表側のデザインが反転して見えてしまいます。
- デザイン・スケーリング:意図したラグのサイズに合うように、デザインの寸法を調整します。投影やトレースの前に、デジタルでデザインのサイズを変更することもあります。
- カラープランニング:異なる色の糸を使用する場所を明確にマークします。この計画により、効率的なタフティングが可能になり、ラグ全体の色の一貫性が保たれます。
- 詳細レベル:複雑なデザインも可能ですが、特に初心者にはシンプルなパターンから始めることをお勧めします。複雑なディテールのタフトは難しく、高度な技術が必要になることもあります。
道具と材料
- プロジェクター:デジタルデザインを生地に投影する。
- 洗えるマーカー/布用チョーク:手描きデザイン用。
- 転写紙:印刷されたデザインを転写する。
- 定規とコンパス:正確な測定や幾何学模様に。
- 鉛筆:最初のスケッチと調整用。
タフティングの工程デザインに命を吹き込む
デザインを裏生地にマッピングした後、タフテッドラグ製造の次の重要なステップはタフティング工程です。この工程では、専用の道具を使って生地に糸を挿入し、ラグの毛足と質感を作り出します。ループパイル、カットパイル、またはその組み合わせなど、どのタフティング技法を選択するかによって、ラグの最終的な外観と手触りが決まります。
タフティング技術を理解する
タフティングには主に2つの技法がある:
- ループ・パイル:この方法では、糸は切断されることなく裏生地に挿入され、連続したループが形成されます。ループパイルラグは耐久性に優れ、表面に凹凸があるため、人通りの多い場所に適しています。
- カット・パイル:挿入後に糸のループをカットし、ソフトでふっくらとした表面に仕上げます。カットパイルラグは高級感があり、その快適さと美しさから住宅によく使われます。
タフティングガンのなかには、両方の技法が使えるものもあり、デザインに柔軟性をもたらしている。
タフティングガンの操作
タフティングガンは、裏布に糸を通す手持ち式の装置です。効果的に使うには
- 銃を正しく構える:タフティングガンをしっかりと握り、生地に対して90度の角度を保ちます。ヤーンの挿入を安定させ、生地の歪みを防ぎます。
- センターから始める:デザインの中心からタフティングを始め、外側に向かってタフティングしていきます。こうすることで、生地全体のテンションを均一に保つことができます。
- 安定したスピードを保つ:タフティングガンは一定の速度で動かしてください。動きが均一でないと、パイルの高さや密度にばらつきが生じます。
- 糸をスムーズに送る:ヤーンがスムーズにガンに送り込まれるようにし、ジャムや不均一なタフティングを防ぎます。ヤーンフィーダーやコーンホルダーを使用すると、このプロセスを支援することができます。
タフトを固定する接着剤の塗布
タフティング工程を終えたら、ラグの耐久性と寿命を保つために糸を固定する必要があります。この工程では、接着剤をラグの裏面に塗布し、タフトを固定し、時間の経過とともに緩むのを防ぎます。
正しい接着剤の選択
適切な接着剤を選択することは、ラグの性能にとって非常に重要です:
- ラテックス系接着剤:柔軟性があり、接着力が強いため、一般的に使用されています。ラテックス接着剤はラグの柔らかさを保ち、時間が経ってもひび割れしにくいです。
- 合成ラテックス化合物:丈夫で長持ちし、人の出入りの多い場所に敷くのに適しています。
- PVA(ポリビニルアセテート)接着剤:壁掛けや装飾品によく使われるPVA糊は、塗布は簡単だが、ラテックス系に比べると柔軟性に欠ける。
応募方法
接着剤を効果的に塗布し、タフトを固定する:
- ラグを伸ばしておく:カーペットをフレームに張った状態で接着剤を塗布することをお勧めします。絨毯の形が保たれ、接着剤が乾いてゆがむのを防ぎます。
- 均一に塗る:ヘラ、ブラシ、または手袋をした手で、接着剤をラグの裏面に均等に広げます。すべてのタフト部分が十分に覆われていることを確認し、ヤーンを固定します。
- 乾燥させる:接着剤の種類や環境条件によって異なりますが、最大24時間かかります。
最適な結果を得るためのヒント
- 換気:特にヒュームの強い接着剤を使用する場合は、換気の良い場所で安全に作業してください。
- 過剰塗布を避ける:余分な接着剤は裏生地から染み出し、ラグの外観に影響を与えます。適度な量を塗布し、過飽和にならないようにしっかりと接着してください。
- テスト・ファースト:接着剤と素材との相性が不明な場合は、ラグ全体に使用する前に、少量のテスト塗布を行い、結果を確認してください。
セカンダリー・バッキングの追加安定性の向上
ラグの構造をさらに強化するため、接着層の上に二次的な裏打ち布を貼り付けます。この層を追加することで、寸法が安定し、耐久性が向上し、ラグの外観が仕上がります。二次裏打ちの一般的な素材には、フェルト、キャンバス、合成繊維などがあります。
仕上げシャーリングとカービング
好みの質感と奥行きのあるデザインに仕上げるため、ラグはシャーリングとカービングを施される。シャーリングは糸を均等な高さにカットし、均一な表面を作ります。カービングとは、特定の部分を異なる高さにカットして立体感を出し、デザイン要素を際立たせる、より細かい工程です。このような仕上げにより、ラグの美的魅力と触感が高まります。
品質管理卓越性の確保
タフテッドラグが市場に出回る前に、厳しい品質管理チェックを受けます。職人がラグのデザインの一貫性、タフトの高さの均一性、確実な接着性を検査します。最終製品が高水準の職人技と耐久性を満たすよう、あらゆる欠陥に対処します。
梱包と発送最終製品の配送
承認された絨毯は、輸送中の破損を防ぐために慎重に梱包されます。ラグの完全性を守るため、保護包装と頑丈な梱包材が使用されます。完成品は小売店、卸売業者、または直接お客様に出荷され、そのユニークなデザインと品質で居住空間を向上させる準備が整います。
結論
タフテッド・ラグのコンセプトから完成までの道のりは、創造性、職人技、現代技術の融合の証です。それぞれのラグはそのデザインと構造を通してストーリーを語り、どんな空間にも個性的なタッチを与えます。手織りでも機械織りでも、タフテッドラグは美しさと機能性の両方を求める人に人気のあるインテリアです。
よくある質問
- タフテッドラグと手織りラグの違いは何ですか?
タフテッドラグはタフティングガンを使って裏生地に糸を挿入して作りますが、手織りラグは織機でひとつひとつ手で結びます。一般的にタフテッドラグの方がリーズナブルで、短時間で仕上がります。
- タフテッドラグは人通りの多い場所で使えますか?
タフテッドラグは、特にウールのような丈夫な素材を使った場合、人の出入りの多い場所に適しています。ただし、寿命は素材や構造の品質によって異なります。
- タフテッドラグはどのようにお手入れすればよいのですか?
汚れやゴミを取り除くため、定期的に掃除機をかけることをお勧めします。